 Topper's
Place
Topper's
Place

|
|
Click here to go to this page at new link Thought I'd share some of my favorites. I've taken pics so that you get an idea of what they look like. Topper
Pies
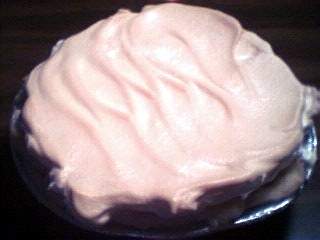
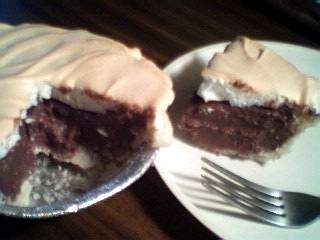
Chocolate
Cream Meringue Prebaked pie shells (4 tart sized or one 8 or one 9 inch)
1 recipe Meringue In sauce pan, combine sugar, flour, and salt; add cocoa and shortening; gradually stir in milk. Cook and stir over medium heat till mixture boils and thickens. Cook 2 minutes longer. Remove from heat. Stir small amount hot mixture into lightly beaten egg yolks (by mixing a bit of the hot mixture into the yolks it will warm them up and prevent them from clumping when you add to the hot mixture. Take a large spoon full and just drizzle into the yolks while stirring); return egg yolk mixture to hot mixture; cook 2 minutes, stirring constantly. Remove from heat. Add butter and flavor. Stir until butter is melted and mixture is smooth and creamy. Pour into baked pie shells. Spread meringue over hot filling. Take care to seal the soft meringue up against the edge of the crust. This will prevent the meringue from shrinking during baking and keep your pies looking pretty. Put in whatever decorate swirls and peaks that you like. Or you can use a pastry bag and get really fancy. Try not to leave the top perfectly smooth, though. The ridges and peaks heat up more and get the darker color, helping you to tell when the topping is cooked and it makes the meringue prettier. Put in preheated 350 degree oven for about 10 to 15 minutes until the tops are just getting golden on the peaks and ridges. Cool for about an hour or so before putting in refrigerator. This will help to keep the pie from 'sweating'. Little droplets of moisture that sometimes form on top of the meringue. They don't hurt the pie, it's just not so pretty. Sorry.. I happen to love the look of a nicely done meringue pie so I guess I kinda linger on the topic! hehehehe
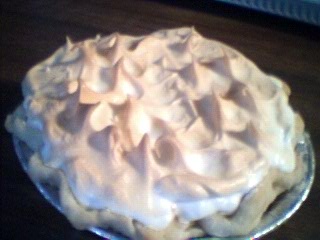
Orange Meringue Prebaked pie shells (4 tart sized or one 8 or 9 inch)
3 egg whites In saucepan mix sugar, cornstarch, flour, and salt. Gradually blend in water. Bring to boiling over high heat, stirring constantly. Reduce heat to medium; cook and stir 8 minutes more. Remove from heat. Stir small amount of hot mixture into egg yolks; return to hot mixture. Bring to a boil over high heat, stirring constantly. Reduce heat to low; cook and stir 4 minutes longer. Remove from heat. Add orange (or lemon) peel and butter. gradually stir in orange juice. Pour into prebaked pie shell(s). For meringue, you can use regular meringue or this flavored version. Beat egg whites with 1 teaspoon lemon or orange juice till soft peaks form. Gradually add 6 tablespoons of sugar, beating till stiff peaks form and sugar is dissolved. Spread meringue over hot filling, sealing to edges of pastry. Bake in 350 degree oven 12 to 15 minutes or till meringue is golden. Cool at room temp for about an hour and then chill thoroughly in refrigerator to set filling. I prefer over night.
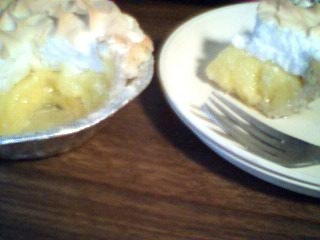
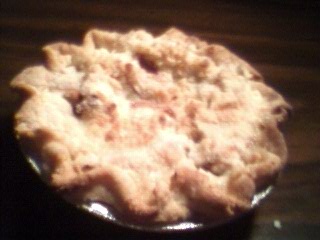
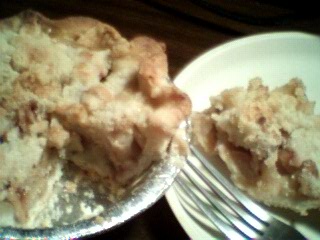
Apple Crumb Unbaked pie shells (4 tart sized or one 8 or 9 inch)
Peel apples; slice or dice apples (I prefer removing the core and dicing for the tart sized pies). Place in pie shell Mix 1/2 cup sugar with the cinnamon and sprinkle over the apples. Mix 1/2 cup sugar with the flour; cut in butter with pastry blender or two knives until crumbly. Sprinkle over apples. Bake in 400 degree oven 40 minutes for regular pie and 30 to 35 minutes for tart sized - until top is golden but crust does not burn. Cool.
Flaky Pie Crust
Makes 1 - 2 crusted pie, 2 - 8 or 9 inch
shells or 8 tarts 2 1/2 cups sifted flour Toss the dry ingredients around a bit to mix. Add the cup of chilled shortening. Using a pastry blender (I gave up the two knives routine LONG ago) cut the shortening into the dry ingredients. You want this to look mealy. I found the easiest way to do this next step is to use a spatula and clear a space in the bowl... now move a bit of your blended mixture back and just drizzle a wee bit of ice water on it. Now move some more of the cut mixture over to this spot and drizzle a little water... slowly move around the bowl until you've moved all 'sections' of the mixture and drizzled water over it... Use the spatula to see if you can press the mixture against the side of the bowl. Does it hold it's shape or crumble away in an avalanche? If it holds, don't add any more water! If it kinda crumbles a bit maybe add another tablespoon of ice water drizzled over the entire bowl... if it totally falls apart for sure add another tablespoon, and maybe the second, drizzled throughout. Ideally you want it to just barely hold together, it should be a challenge to get it to hold its shape if you try to make a ball out of half of the mixture. The perfect crust will actually be a challenge to 'ball'. Too much water, working the dough too much, or letting the dough get too warm results in a tough/chewy crust. The perfect crust will shatter when you cut it and will be very light and flaky. If making two regular crusts lay out a piece of plastic wrap and place your dough ball (half the dough that you made) in the center. Flatten like you would a hamburger patti, so it's an inch or inch and a half thick. Use your fingers and the palms of your hands to smooth out the sides, remove the cracks and breaks. Now gather the plastic wrap up the sides folding over the top of your flattened round so that it is fairly snug with no air... turn over so that the gathers are on the bottom. Press it a bit to flatten. Use your palms around the sides to press into the sides of the round to smooth out any cracks... flatten the round a bit more again. Set on a plate and put in the fridge.. Now do the same with the second round. If you are making tart sized.. Take your flattened round and cut into quarters. Take the quarters and form balls. Place each piece of dough on a piece of plastic wrap and flatten and smooth the edges just as you would on the larger piece, gathering the plastic up etc.... Place them on a plate and put them in the fridge. Remember this hint for flaky crust. Keep everything cold. The idea is to keep the shortening from softening and the flour absorbing the moisture. Put your rolling pin in the freezer the night before you plan to roll out your crusts. Don't let your dough warm, the pieces that you aren't working with should stay in the fridge. Let the dough packets rest in the fridge for at least half an hour. I prefer letting them rest until the next morning. They will last this way for two days before they start drying out and you won't be able to roll them out. Put the packets in an airtight container and you can freeze them for up to six months. To use you'll want to let them thaw in the fridge for a day. Ready to roll them out? Lightly flour the surface that you'll be rolling them out on. Flour the rolling pin. I also chill the surface that I'm working on.. either rolling out the crusts on a heavy cookie sheet that I had in the freezer OR putting a cookie sheet on the counter where I'll be working and putting ice on it for a while before I start working. Then moving the sheet out of the way to flour the counter. Chilling the surface makes the dough so much easier to work with! Unwrap the round and place on the flour surface. Being gentle with the rolling pin roll out from the center of the round to the edge in the same pattern as the spokes on a wagon wheel. Try to keep it evenly round using your fingers to smooth out the edges if they start to crack. Don't let the edges get thin and the center stay thicker pull up a bit on the pin to keep the thickness the same from edge to edge. Roll it into a circle that bout 3 inches larger that your regular pie pan and about 1 1/2 inches larger than your tart pan. If the crust sticks to the pin reflour the pin lightly. To place a full size crust in the pan loosely roll the crust around the pin and then unroll over the pie pan. For the smaller crusts I think it's easier to put the tart pan upside down over the crust. Slip a spatula underneath and then flip it over. For both sizes gently ease the crust down into the tin.. jiggling it and shifting so as not to stretch or tear the crust. To top a double crusted pie, large or small. Roll the crust loosely on the rolling pin and then unroll over the filled pie. For both types fold the edges under and flute in your favorite style. For prebaked shells use a fork to poke holes around the bottom and sides. This helps to prevent the crust from puffing up... keeping it flatter and flakier. Put the crusts in the fridge for about 1/2 hour or so. This allows the dough to relax and hold it's shape. Less likely to shrink or warp or puff when you bake. For unbaked shells (single crust). Let rest in the fridge for 1/2 hour, fill and bake according to recipe. For double crusted pies. Put bottom crust in pan. Put in filling according to recipe. Put on top crust. Trim excess dough to leave about 1/2 to 1 inch of crust. Fold top crust under bottom crust and flute. Bake let rest in fridge for about 1/2 hour and then bake according to recipe. This will let the dough rest and it will hold its shape better.
Basic Meringue topping for 1 - 8 or 9 inch pie or 4 tarts 3 egg whites (room temp is best) Place egg whites and cream of tartar in medium bowl. Mix at high speed (use wire whisk if your mixer has one) until it turns white and soft peaks hold their shape. Reduce speed to medium high and add sugar 1 tbsp at a time, Make sure the sugar dissolves after each addition. Spread over hot pie filling, if possible, to be sure the meringue bakes all the way through. Be careful to seal meringue to crusts to help prevent meringue from shrinking or cracking during baking. Be creative, making peaks and swirls and designs in the soft meringue makes a prettier pie and gives peaks and ridges that will darken to let you know the meringue is baking. A flat topping will not brown until you've burned the pie. Bake in 350 degree oven for 12 to 15 minutes until the topping begins to brown. Let cool for about an hour before placing in refrigerator to set filling. Cooling at room temp first reduces possibility of the meringue sweating (forming small droplets of liquid on the surface of the meringue). The droplets won't harm the pie they just don't look as pretty.
Basic White Bread
|
Remember, Topper's Place is moving, feel free to add the new link to your Favorites: www.toppers-place.comEmail:
Topper (Linda)
|