Topper's Place           
          Hydroponics 

           Home Up Contents Feedback Save A Step Thyroid
                          Topper's Place has moved        No more popups!          www.toppers-place.com          Please wait a few seconds for this page to continue loading, it will include a link to this page at the new ad-free location         The new link is:   www.toppers-place.com  


Click here to go to this page at new link

I was introduced to a method of hydroponics by one of my visitors (thanks, Chuck) that really got my brain to working. I started mulling it over and decided to try it out. The following is the results of this little ongoing experiment.....

Initial Setup

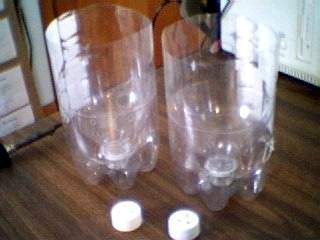
The intent of this project was to use a tidbit of info that I received from a site visitor that sparked my imagination and could make use of things I had laying around the house to set up a type of hydroponic gardening using recycled materials.

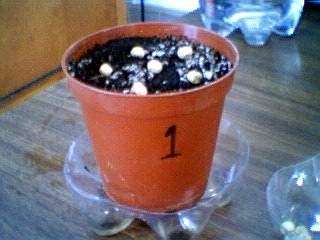
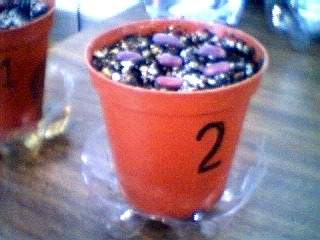
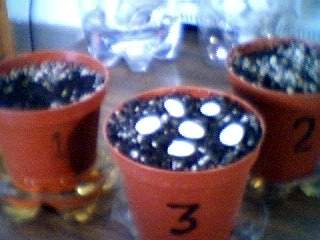
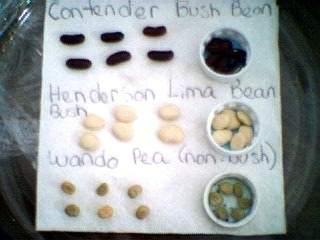
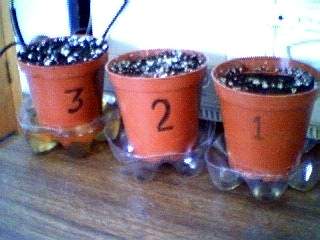
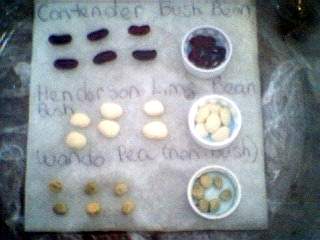
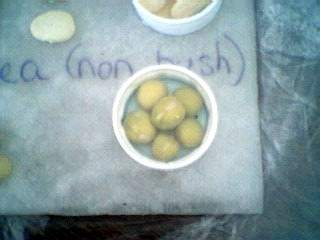
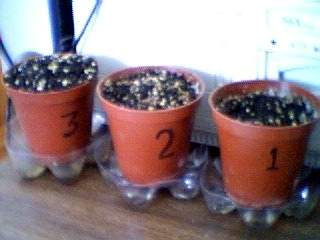
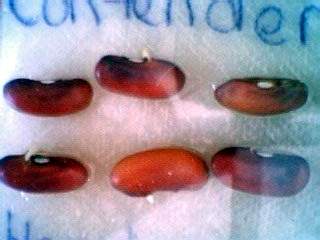
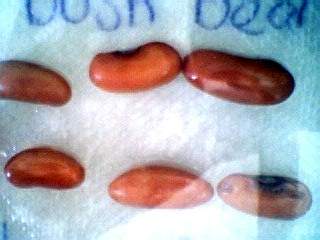
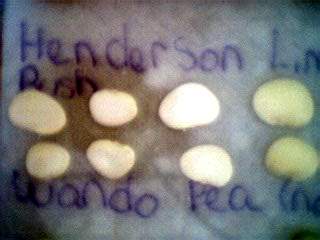
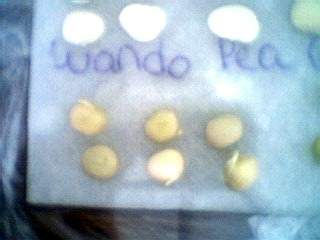
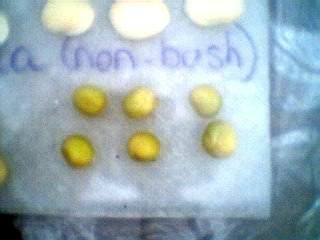
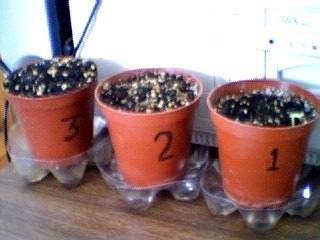
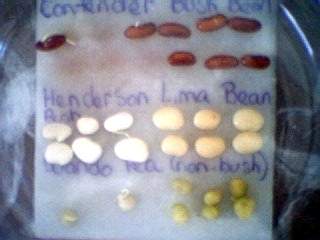
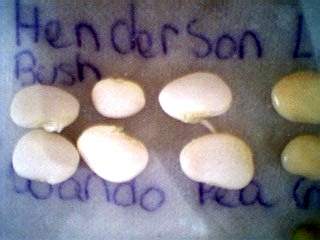
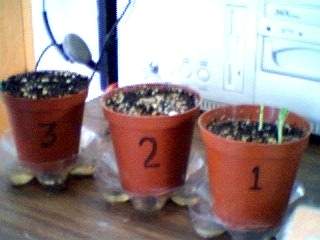
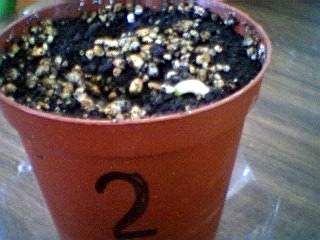
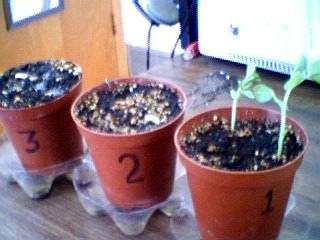
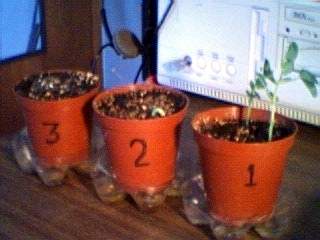
In order to have some points of reference to see if this new method was valid or not I set up the same seeds using two other types of starting plants.

My seeds are all on the old side, but they had good sprout rates last year.. and they are what I have in the house. I choose three types of seed that are large enough to see and handle easily that would also provide an edible crop if successful.

Peas soil ready to plant.jpg (12921 bytes)
Pot number 1 - Wando Peas, a climber
Standard potting soil, plastic plant pot, drip tray
6 seeds per pot ready to press into soil and water


Beans soil ready to plant.jpg (13468 bytes)
Pot number 2 - Contender Bush Beans
Standard potting soil, plastic plant pot, drip tray
6 seeds per pot ready to press into soil and water


Limas soil ready to plant.jpg (12676 bytes)
Pot number 3 - Henderson Bush Lima Beans
Standard potting soil, plastic plant pot, drip tray
6 seeds per pot ready to press into soil and water


Peas ready to soak.jpg (10660 bytes)Towel dry 1.jpg (11956 bytes)I also started six of each seed on damp paper towel and in a bottle cap with water to plump. The paper towel is labeled and it and the bottle caps are on a glass plate covered in plastic wrap to hold moisture. Soaking seeds are rinsed daily and given clean water.

Packing Peanuts.jpg (11609 bytes)Two Assembled pots.jpg (11862 bytes)I chose to use packing peanuts as the growing medium, breaking the pieces in half, and Pop Bottle Pots as the container. I'll hand pour and use the reservoir as the catch basin. Two items that are GOOD to recycle.

Peanuts in bottle pot 1.jpg (10644 bytes)          Peanuts in bottle pot 5.jpg (11950 bytes)         

Sunday, February 23, 2003 - Day 1
Seeds are started in three popular methods.
The seed started in the soil will be my 'control' group. As they sprout I will thin to the strongest two seeds per pot. Later I will thin to strongest one. As for the other two sets of seeds.. the strongest sprouters with be the ones introduced to the peanut filled bottle pots. My plan is to have three plants per pot. That would be about the same growing space that plants would have if placed in a square foot garden.. I have had good results growing all three of these varieties in soil filled Pop Bottle Pots in the past.

Soil pots new.jpg (13579 bytes)        Towel wet 2.jpg (12075 bytes)        Peas ready to soak.jpg (10660 bytes)

Monday, February 24, 2003 - Day 2

three pots day 2.jpg (14935 bytes)        towel wet day 2.JPG (12980 bytes)        peas soaking day 2.JPG (10261 bytes)

Tuesday, February 25, 2003 - Day 3

three pots day 3.JPG (11771 bytes)        towel we day3.JPG (12091 bytes)        peas soaking day3.JPG (9770 bytes)

Wednesday, February 26, 2003 - Day 4

Soil Pots day4.JPG (11053 bytes)towel wet day4.JPG (12348 bytes)Day four for both the standard soil pots and the sprouting seeds. Some of the seeds have popped tap roots.. the close ups are below.. We are ready to put seeds in the 'hydroponic pop bottle pots....

towel wet beans day 4.JPG (12193 bytes)soaked beans day 4.JPG (11712 bytes)The left shot of each pair are the seeds that were started on damp toweling.. the pic on the right in each pair are the seeds that were soaked for the first three days. 

wet towel limas day 4.JPG (11417 bytes)soaked limas day 4.JPG (11231 bytes) I was rather surprised to see that the seeds that were soaked and had plumped much quicker (showing uptake of water was quicker) were not the first to sprout.


towel wet peas day 4.JPG (9465 bytes)
soaked peas day 4.JPG (9919 bytes) I suspect that since none of the limas have sprouted that the seeds may no longer be viable. All three varieties are from seed packets dated 1998 so it is possible that they are dead. I will wait a few more days before tossing them.

Hydro Bean day 4.JPG (4488 bytes)
Hydro Pea day 4.JPG (4184 bytes)With four seeds sprouted for both the beans and the peas I decided to place three seeds to grow in the center of each pot and set the extra fourth one on the edge so that I could watch the growth progress. I still don't know if this method of hydro with this medium will work.. so this way I will be able to see if the seeds are growing, become diseased or die.         

Thursday, February 27, 2003 - Day 5

soil pots day5.JPG (11804 bytes)        hydro bean day5.JPG (10054 bytes)        hydro pea day5.JPG (10023 bytes)

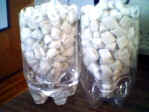
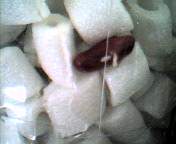
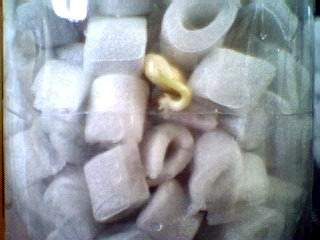
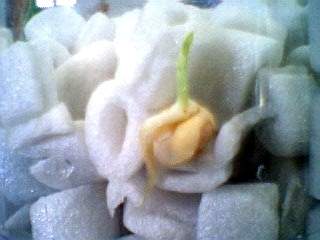
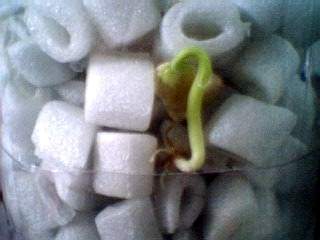
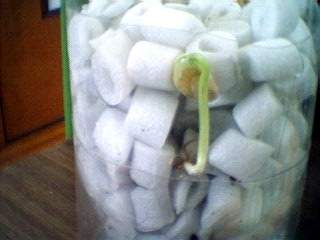
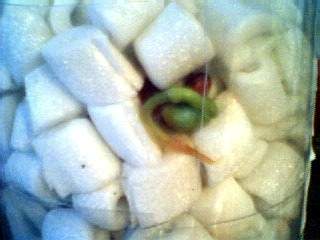
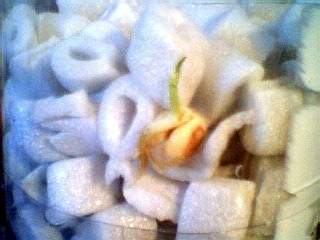
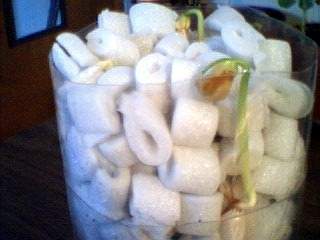
Even though the packing peanuts don't 
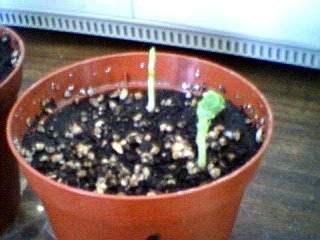
shift while tipping the containers to drain
 the reservoirs and do the pour over you can see that the growth of the tap root
 does shift them. I found that to be interesting.

Also if you look carefully you can just see the first pea plant up in the 5 o'clock
position on the edge of soil pot number 1. That pot has been moved to a window sill.

Friday, February 28, 2003 - Day 6

soil pots day6.JPG (12372 bytes)        towel wet day6.JPG (10687 bytes)        towel wet limas day6.JPG (11412 bytes)

hydro bean day6.JPG (11236 bytes)        hydro pea day6.JPG (11283 bytes)        hydro lima day6.JPG (11410 bytes)

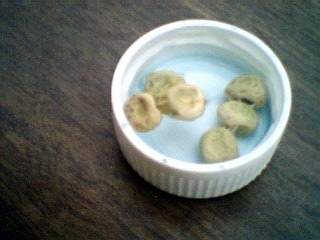
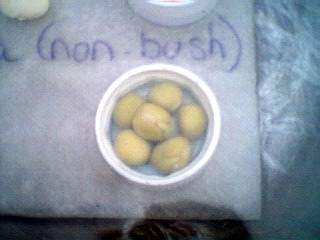
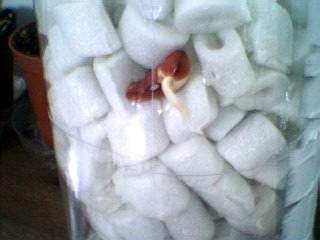
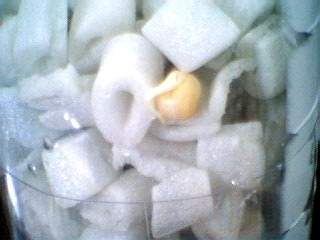
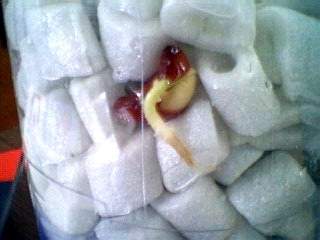
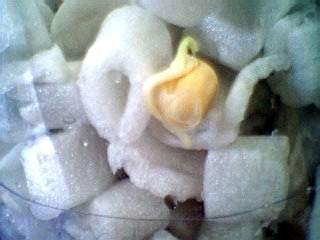
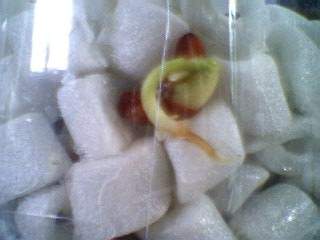
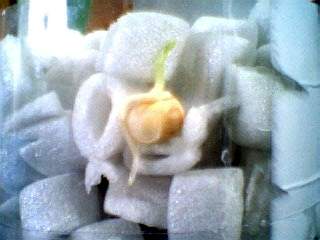
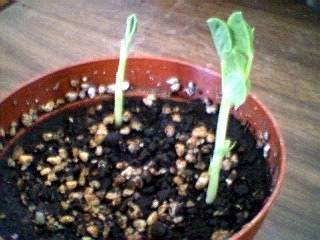
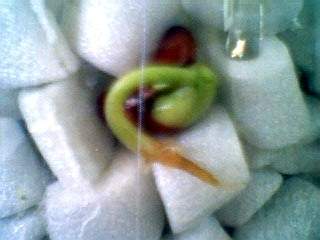
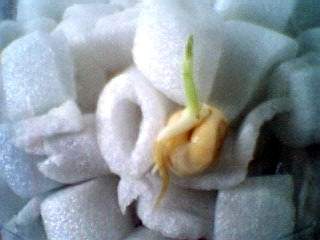
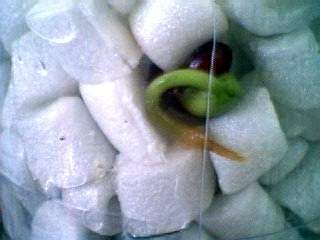
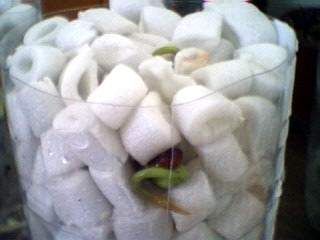
The soaked limas and soaked peas have died.. I've tossed them.. I think I soaked them too long, I usually only do it for 24 hours.. but didn't follow my routine and they were in water for 72. I'd like to test that part again. The seeds that were on the damp towel: All the beans and peas have sprouted - 100 percent germination out of 6 year old seed. The Limas started sprouting. Had four of them ready for the hydroponics pop bottle pot.. 

So.. on the left is the bean, center is the pea and the one on the right is the lima.

In the soil pots, control group.. a second pea plant as broken the soil surface.

Saturday, March 1, 2003 - Day 7

soil pot day7.JPG (11273 bytes)        soil peas day7.JPG (14192 bytes)

hydro bean day7.JPG (9772 bytes)        hydro pea day7.JPG (11496 bytes)        hydro lima day7.JPG (11388 bytes)

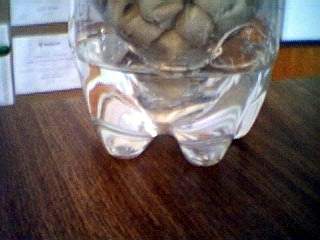
I've been hand watering these roughly every four or five hours.. as I think of it... in the morning when I first get in the office.. around 11ish.. pictures are taken around noon.. and then a watering in the evening sometime.. then before going to bed.

The water is dumped out of the reservoir into a container and poured over the top.. 4 or 5 times each time.. allowing the water to remain in the reservoir until next time.

Sunday, March 2, 2003 - Day 8

soil bean day8.JPG (13937 bytes)        soil peas day8.JPG (15718 bytes)        soil pots day8.JPG (11407 bytes)

hydro bean day8.JPG (10956 bytes)        hydro pea day8.JPG (10825 bytes)        hydro lima day8.JPG (10956 bytes)

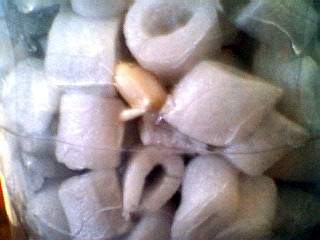
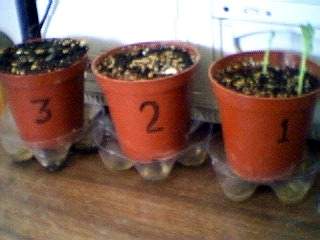
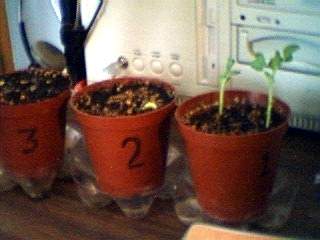
This little experiment start one week ago today:

So far. 18 seeds were sprouted on moist paper towel.. all sprouted except two limas.

18 seeds were soaked for 72 hours then lain on moist paper towel. All 'spoiled'

18 seeds were started in conventional soil pots. 2 Peas and 1 bean are up.

4 of each seed are in hydro pots, none have broken the surface yet.

Monday, March 3, 2003 - Day 9

soil pots day9.JPG (11860 bytes)        soil peas day9.JPG (13064 bytes)

hydro bean day9.JPG (11082 bytes)        hydro pea day9.JPG (10686 bytes)        hydro lima day9.JPG (10842 bytes)

Tuesday, March 4, 2003 - Day 10

soil pots day10.JPG (13986 bytes)        hydro bean day10.JPG (11098 bytes)        hydro lima day10.JPG (9692 bytes)

hydro pea day10.JPG (11247 bytes)        hydro beans day10.JPG (10093 bytes)        hydro limas day10.JPG (9520 bytes)

Wednesday, March 5, 2003 - Day 11

soil pots day11.JPG (12598 bytes)        soil peas day11.JPG (12194 bytes)

hydro bean day11.JPG (11504 bytes)        hydro pea day11.JPG (12177 bytes)        hydro limas day11.JPG (11421 bytes)

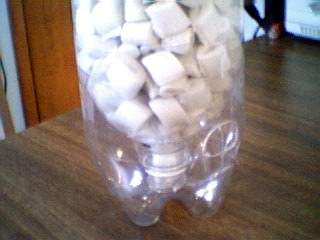
Sunday, March 9, 2003

Conclusions: Well.. I'm gonna say it was a flub. From what I've been reading the last couple of days the problem lies in the packing peanuts not being able to hold water between 'pourings'. It's acts much as perlite. I'm gonna take a leap here and suggest to anyone that wants to try recycling packing peanuts to use as a planting medium treat them as you would perlite and add vermiculite as the moisture holder and the packing peanuts as the mix lightener/aerator.

I may run this experiment again, doing just that.. but first I'd have to pick up the vermiculite... I may also try it using half potting soil half chopped packing peanuts. My point in doing this was to find a practical use for something that isn't otherwise recyclable, other than having it laying around until you have another package to ship.

It's not much fun to have a project flub.. but the only way to learn is to try.. and hopefully my failure might spark a better idea in someone else, one that will work... and one that they may share with me....

Topper


Remember, Topper's Place is moving, feel free to add the new link to your Favorites:   www.toppers-place.com
Email: Topper (Linda)
Yahoo Instant Messenger ID: toppertwo
Site Design by  Topper  
Copyright © 2001 - 2006 Topper
Last modified: May 03, 2006 08:34 AM