 Topper's
Place
Topper's
Place

|
|
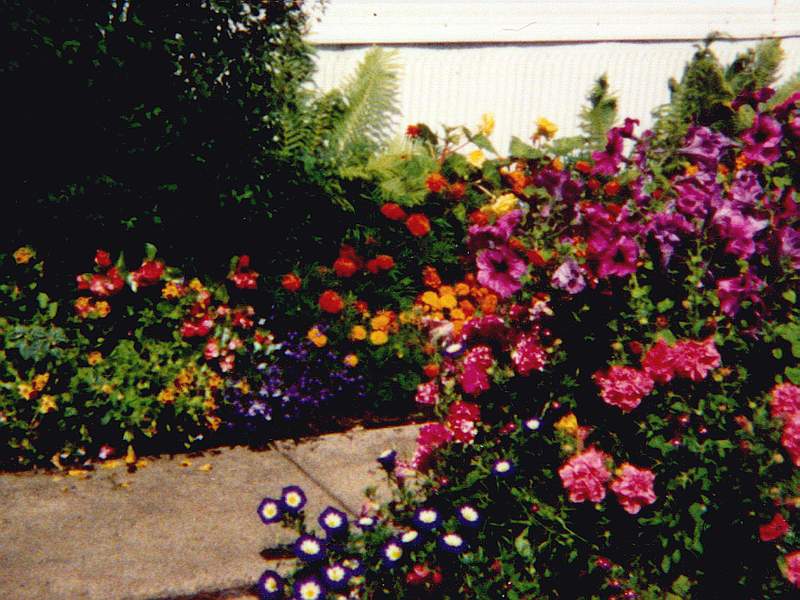
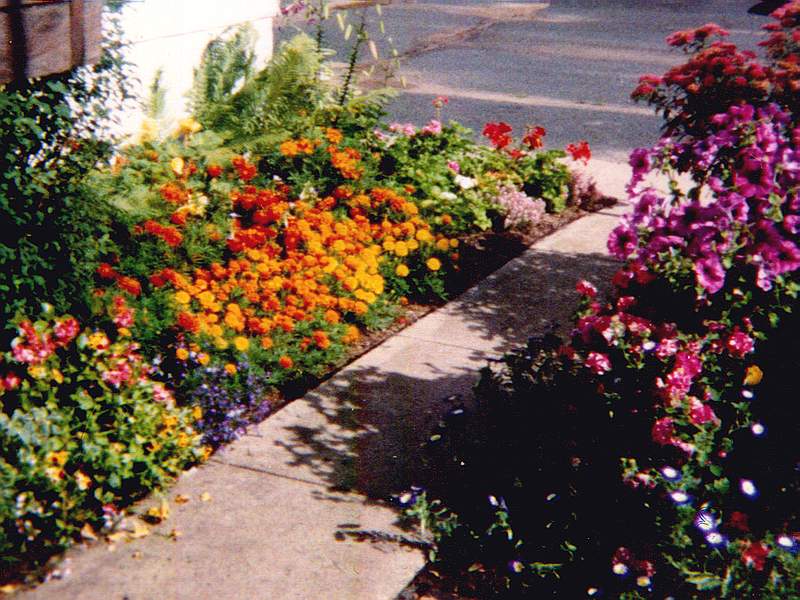
Click here to go to this page at new link Double your growing space using a Pyramid Garden! I couldn't even tell you where I first read about doing these. I do know that they were being used for strawberry plants. But after reading it, as usual, my mind wandered and I flew with it with an excellent result, I think. Before we get into the nitty-gritty of it.... I took a space that would hold about 16 plants and was able to put 37 plants in it! AND instead of having just a single level about 10 or 12 inches high I ended up with a flowering bouquet that was about 3 1/2 feet tall and gorgeous in all four directions - even from across the street! In the first picture you can see the side of the pyramid, to get an idea of the height, on the far side of the side walk are Mimulus (Monkey Flowers), Appleblossom Fibrous (Wax) Begonias, and Dwarf Marigolds (among others). This pyramid was planted with Plum Petunias, Double Petunias, Dwarf Morning Glory (Convulvulous), Moss Rose and Lobelia. In the center picture the pink flowers in the lower right are an annual phlox (they are the same height as Petunias), with some Dusty Miller, and the photo on the right gives an idea as to the height of the pyramid again in relation to the marigold bed. You can click on any of the pictures to get a larger view. Thirty seven plants (fourty one if you want to be brave and put an extra one in the lower level triangles), growing quite nicely, with very good bloom, in an area only 2 feet square! With NO weeding! I'm not the greatest photographer, but I think you can get an idea of just what you can do with this planting style. A living bouquet that contains your favorite flowers that can even be admired from a distance, not just while standing directly above the planting bed looking down!
So easy to put together...
You'll want to cut the boards so that you have four each of the following lengths: 24", 16 3/4", 11 2/3", 8" and 5 1/3". I found it much easier to paint the boards before nailing them together. Here is my handy-dandy little drawing of the pyramid planter assembly:
Just click on the drawing for a larger view... Looking closely at the drawing you will see that there are 4 boards used on each of 5 levels. All four boards on each level are cut the same length. They are positioned/attached in such a way as to keep the squares perfect squares. Simply nail the five frames together. Once you've done that position the largest one on the area where you would like to build your pyramid garden (you'll want this area already dug and prepared for planting.) take a few minutes and work toward getting the top edge to be pretty close to level. It looks nicer and it's easier to water. Once it's in place; proper angle, pretty close to level. Once you have all five levels in place step back and take a serious look at it.. You'll want it to look kinda symmetrical, although I know some folks that skew them a bit to make them look different. Since each level is held in place by the soil that it is filled with it is surprisingly solid and super simple to set up, or to move at the end of the season, if you choose. Once you're happy with how it looks its time to plant. The numbers that I've put in the center of each planting triangle would be the number of plants that you can place in each area based on a plant with a 6 inch spacing for a regular planting bed.. so go from there to determine what your spacing should be for the plants that you will be growing. Remember the roots will be growing toward the center of the pyramid and will have plenty of room so you can plant rather thickly and still get excellent root development and growth. Plant the center top first.. and then work your way down from there. Think about plant heights and colors as you put things together (or plant all the same and make it look like a gorgeous mound of flowers!) You can get really creative with this, I can't imagine one that wouldn't turn out simply breath-taking. Feel free to plant in the ground around the base of your pyramid if you like. Or, just plant within the pyramid and you'll have a flower bed that you can easily use a weed whacker around the edge of to keep everything nice and neat after mowing. Once all the plants are in place it's time to water... You'll be better off taking your time with this and doing a really good job.. it will make all the difference in the end result. Water each planting triangle gently, slowly and deeply. You want the entire pyramid to be thoroughly saturated. After soaking all four sections on a level go back up to the center top and water it again. What we're doing here is making sure that the pyramid is soaked all the way through so the the roots will grow deep into the soil. Since they are planted so closely together we want the roots to grow deep into it and not spread sideways. Got everything watered really deep? Now, for the finishing touch. Mulch. The soil will most likely have settled from the watering and you have some free space on the surface of the soil.. put in your favorite mulch or compost, nice and thick. We're choking out the weeds with this step and making sure that the pyramid retains moisture. I used leaf mold... looks really pretty until the plants fill out and hide everything. But use whatever you like. You can build it up a bit over the edge of the boards, no problem in doing that at all.. just go for it... With all the mulch in place, everything watered deeply... now gently sprinkle the whole thing to settle your mulch and you're all done! Take a bit of time, put this together right and what you'll end up with is a really nice living bouquet that stands a couple of feet tall, allows you to enjoy the flowers from a bit of a distance instead of having to stand right above the bed. Keep the flowers dead headed, keep an eye out for any weeds that may try to sneak in and give it a really good, deep watering once a week - more if you see the plants are in need.. but don't get into a habit of watering daily.. we want to encourage the plants to reach deep toward the center of the pyramid so that they will be healthy and strong. After mine filled out I snuck 4 20 ounce pop bottle waters in the top level. The plants were large enough to hide them. I kept them filled with water to make sure that everything stayed thoroughly saturated. This same system can be used for vegies, and strawberries too! Any where that you'd like to increase the number of plants that you can grow in the available space. It's an excellent way of taking advantage of vertical space for plants that are not normally thought of in a 3-D concept. I had two pyramids. The one I show in the pics above and the other was planted with everbearing strawberries. The berries did REALLY well! Oh, one thing that I found to be kinda fun... if you're a fan of Lobelia or Allysums.... place a plant at the outside point of each square/level. The plants will spill over the side and you end up with the tiny flowers peeking out from your bouquet much like baby's breath does in a flower vase...
I'd love to see pictures of other folks pyramids and variations in using vertical growing space. Might spark some new/weird ideas in my brain! hehehehe
|
Remember, Topper's Place is moving, feel free to add the new link to your Favorites: www.toppers-place.comEmail:
Topper (Linda)
|